Cannabis light burn is a serious threat if you have a room full of plants. Light provides food to your crops, but too much of it may do more harm than good.
Most growers never give thought to light intensity until they notice their buds turning white.
Providing too much or too little illumination to your crops may be detrimental. Knowing how to adjust your lighting magnitude is imperative to finding the sweet spot for your weed.
Understanding what light burn looks like is vital to combat it better. Sometimes the LED light bleaching symptoms may resemble other conditions like heat stress or nutrient deficiencies. The leaves turn yellow, buds bleach, and the yield reduces.
So, how do you tell the difference?
Keep reading as we unpack light burn, its causes, symptoms, and preventative measures.
What is cannabis light burn, and what causes it?
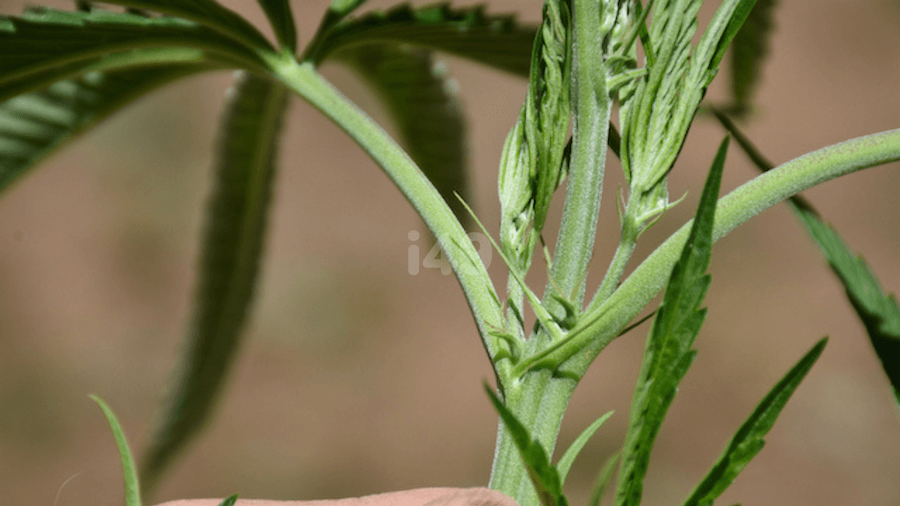
Marijuana light burn is a condition resulting from placing cannabis grow lights too close to plants. It often affects indoor growers relying on artificial illumination, giving crops a bleached appearance.
The proximity of your weed plants and the light source overexpose them to extreme stress.
The impact of this closeness starts from the top of your plant, affecting the areas directly under the illumination.

Sunburn in weed plants grown outside is rare as your crops will never get too close to the sun. If you notice signs of light stress in them, they didn’t have enough time to adjust from shady conditions to direct sunlight.

Light burn is prevalent in today’s indoor grows as cultivators turn to high-efficiency LED lamps.
Thanks to the assumption that these devices produce less heat, many growers place them too close to their crops. That may seem prudent initially, but it may ultimately lead to cannabis light stress.

The first target is your plant’s leaves, which may get scorched by excessive illumination. Although Chlorophyll, the green pigment on your cannabis leaves, helps in light absorption, it cannot tolerate too much of it. It may start bleaching and affect photosynthesis.
Too much light on weed plants can wreak havoc at any stage of your crops’ growth cycle. Some cultivators detect the effects right from the seedling stage. In other instances, the repercussions show much later as leaf burn.
Signs of weed light burn
Your marijuana crops can only tolerate so much light. After a certain point, the plants may exhibit stress signs close to the light sources.

You may notice burnt weed leaves at the top, and possibly curling, and bleaching, among other symptoms. New plant growth is light green, so these may indicate a problem with your weed.
It’s also common for plants to droop from too much light.
The first signs of light burn may not surface overnight. The illumination stress impact picks up gradually.
It’s imperative to keep a watchful eye if you feel your grow lighting fixtures are hanging too low.
Below are the common symptoms to look out for in light burn. Pay close attention to their distinct nature to avoid mistaking them for heat stress or other issues.
Leaves start curling up
Sometimes, before the full effects of cannabis leaf burn, such as a yellowing kick in, the plant’s leaves may initially curl upward. You’ll notice the tips facing that direction in an attempt to take cover from the stressing light.

The leaves may then gradually lose their luster and turn crispy. They may also appear burnt with brown marks.
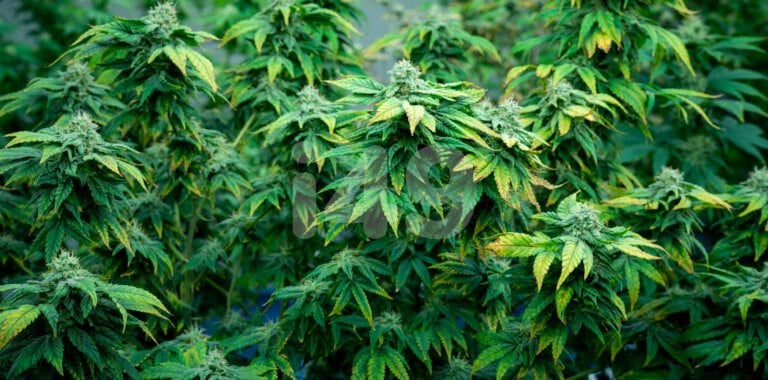
Yellow leaves and leaf tips
As the stress intensifies, yellowing pops up. Here it may get tricky because this discoloration usually indicates a host of health issues with your marijuana.

It may indicate certain nutrient deficiencies or just weed light burn. Don’t be confused, though, as you can quickly tell the two apart from the following symptoms:
- The distress will often start from the plant’s bottom if it’s a deficiency problem.
- In case of a light burn, the yellowing begins from the top, and the leaves only appear discolored, not sick. Their veins will retain their greenness.
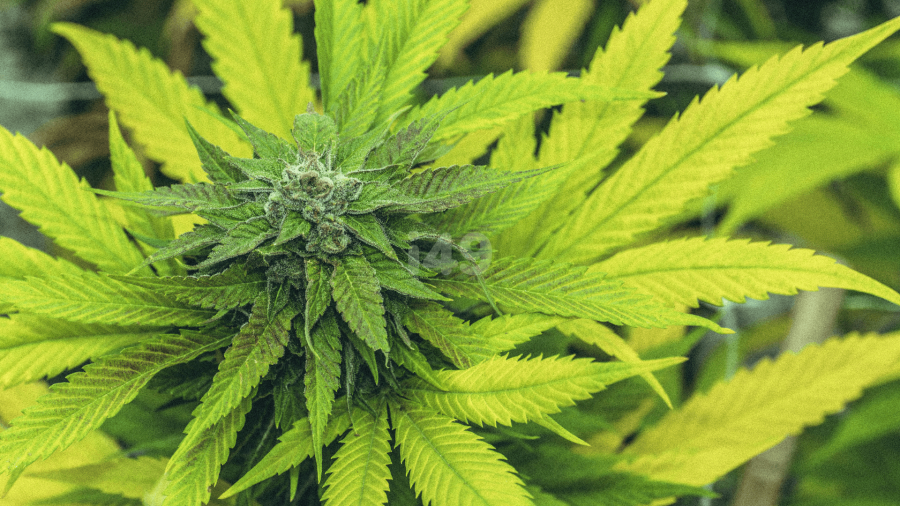
Light bleached buds
Light burn may cause bleaching and give rise to white weed buds if left untreated. This coloring is the most prominent sign to watch out for.

The top buds become the first to change when the lights are too close to the canopy. The flowers take on a bright white appearance or a frosty “albino” look.
To the eye, this may seem appealing but actually spells bad news. Light bleaching weed causes your buds to lose potency, aroma, and flavor, rendering them useless. Like heat stress, the high-intensity lighting degrades the terpenes and cannabinoids of your marijuana.
Brown buds
In extreme cases of LED light stress on plants, your nugs may go from bleaching to browning. This effect causes your crops to look paler. You’ll notice a brown bud that appears burned.

It’s common in the flowering stage. The tiny sugar leaves will first turn yellow and then gradually brown and strip the plant of its beauty.
Light burn vs. Nutrient burn
It’s not uncommon for growers to confuse light bleached weed with nutrient burn. However, if you look closely, telling them apart becomes a breeze.
Light burn vs. nutrient burn: Here are the telltale signs to watch. In the former, you’ll notice:
- Leaves pointing upward
- Bleached or brown buds
- Hard to remove leaves
- Yellow leaves and tips
- Veins remain green
If it’s a nutrient burn, you’re likely to spot the following:
- Bending or curling leaf tips
- Yellow or brown leaf ends
- Oversaturated deep green leaf color
- Purple, magenta, or deep red stalks and branches
While the two share some symptoms, they differ in others. Cannabis light bleaching affects the leaves and buds, which isn’t the case for nutrient burn. Additionally, it discolors the leaves while retaining the green color of their veins.
The two also arise from different agents. Nutrient burn results from overfeeding your cannabis with minerals, whereas light burn is a product of too much LED light bleaching.
Light burn vs. Nitrogen deficiency
Another area of confusion for growers is accurately distinguishing light burn from nitrogen deficiency. They both exhibit symptoms of yellowing leaves, but that doesn’t make them similar.
Nitrogen deficiency starts from the bottom of your plants and slowly makes its way up. Light burn is most prevalent at the plant’s top closest to the light source.
In the former, leaves may fall off on their own, while in the latter, they are hard to pluck off.
Pay close attention to critical parts of the leaves as well. Light-burned weed retains its green veins, which isn’t the case for nitrogen deficiency (mistaken).
As the name suggests, nitrogen deficiency occurs when the plant can’t get enough of that particular nutrient.
What can I do with light-burned cannabis plants?
If light stress on weed plants is taking a toll on you, act fast to salvage your yield.
Start by removing some of the grow lights or moving them away from your plants and reducing their intensity.
If you can’t move the lighting, bend your weed plants over to set the tops farther away from the lamps. Reduce the plant’s height in the veg stage by cutting off the top sections.
Follow this step with adequate watering to replenish any lost moisture. A seaweed tonic might also help in H2O retention. Start plucking off the damaged leaves to reduce stress, or install a cooling system.
Prevent cannabis light stress
Regardless of the marijuana seeds you grow your crops from, preventing the effects of light stress is far easier than curing them. If you notice signs of too much light on seedlings, explore all the possible remedies while exercising caution.

Some factors to consider are the light type, wattage, and distance. It’s also imperative to keep in mind the right temperature, and humidity for growing weed in your grow space.
High temperatures and low humidity may favor light stress.
Below are the techniques to employ to prevent light burn on weed leaves.
Light placement
Cannabis grow lights come in wide varieties and specifications. Place your fixtures as the manufacturer recommends to avoid running the risk of a burn.
The common types of lights used in marijuana grow spaces include:
- LED
- Metal Halide (MH) and High-Pressure Sodium (HPS)
- Fluorescent
- Light Emitting Ceramic (LEC) / Ceramic Metal Halide (CMH)
Each of these comes with specific distance requirements from your crops. The extent typically varies with the light’s wattage. The higher it is, the greater the burn risk.
As you strive to mitigate light stress, avoid hanging them too far. Failure to get placement right might deprive your plants of enough food for healthy growth.
Here is what we may recommend for your placement.
| HPS/MH | Distance |
| 150w | 8 inches |
| 250w | 12 inches |
| 400w | 16 inches |
| 600w | 20 inches |
| 1000w | 24 inches |
| LED | Distance |
| 200–400w | 5 inches |
| 400–600w | 23 inches |
| 600–800w | 33 inches |
| 800–1000w | 35 inches |
| +1000w | 39 inches |
Light level intensity
How much light does a weed plant need? This question depends on the equipment used. Powerful lamps emit a lot of heat, which is likely to cause light stress.
Use DLI (daily light integral) and PPFD (photosynthetic photon flux density) to adjust the optimal illumination intensity for your weed growth.
DLI tells the maximum amount of photosynthetically active photons (PAR) a plant can withstand over a 24hr period. PAR indicates the extent of light your crops use for photosynthesis. PPFD shows you the actual amount reaching your crops from the fixture.
These measures vary according to the growth stage of your plant. Know how much intensity is suitable for which phase before installing your lighting.
We recommend these ranges backed by an ideal weed light cycle to avoid a burn.
| Growth phase | PPFD |
| Seedling | 250–400 |
| Vegetative | 400–600 |
| Flowering | 600–900 |
Low-stress training
Low-stress training (LST) involves bending your cannabis plant stems horizontally to permit light penetration inside the canopy. Twisting the stalks downward automatically reduces the distance between the crops and the rays.
Realize that successful LST requires strong cables or wires as the stems may try to reach back up to face the light. Be gentle, though, to avoid hurting your plants with cabling.
ScrOG
Screen of Green (ScrOG) is a type of LST technique you can use to control the height of your plants. It’s also valuable for optimizing weed yield per square foot.
The method entails bending the branches horizontally rather than vertically. This action produces a well-spread canopy while exposing more flower nodes to the light source. Once you master how to ScrOG, you can expect improved plant growth and yields.
Lux meter
A lux meter is an intuitive tool to help position your grow lights at an optimal distance above your canopy. It eliminates the guesswork in determining how much illumination your crops are exposed to.

The device indicates the light intensity to confine you within the optimal ranges. It helps you answer, “Are my crops getting too much, too little, or just enough?”
Between 35,000 and 70,000 lux is an ideal range in the veg stage. Anywhere from 55,000 to 85,000 lux sits well with the flowering phase. If you suspect any extremes after taking the measurements, adjust the light distance to the canopy for the ideal level.
The tie-down technique
Another LST technique, the tie-down method, involves tying down your crops’ branches to level the canopy for better light penetration. It helps to model your plant’s structure to fit well in your grow tent. Setting the stems horizontally ensures a safe distance from the light source.

This technique allows you better modeling flexibility than ScrOG and is the cheapest.
Spare your plants the “too much” stress
Light burn on cannabis is a potential threat to your yield, so don’t overlook it. Its symptoms are apparent, although they’re sometimes mistaken for nutrient deficiencies. To rule out the confusion, understanding what to look for is imperative.
The common signs of light stress are bud bleaching and leaf yellowing which usually begin from the canopy top.
You can resort to LST techniques or rating your illumination fixtures if you note these symptoms to begin light burn recovery.
Ensure you also get the proper distance between the lights and the canopy to prevent the problem from occurring in the first place. Find the optimal height, as extremities might be counterproductive.
Combining these measures with quality cannabis seeds will get you double the value. Purchase these from a trusted seed bank. Contact i49 today to choose from our rich selection.

Blog Categories
Top 10 Cannabis Seeds